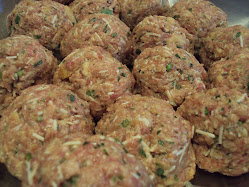
Poutine
1/28/10
Tonight for dinner I am making poutine in honor of my wife’s French Canadian ancestry. The funny part is she never knew what poutine was until I told her. Regardless I feel we commune with our ancestors through food. That is why cuisine of Italian, Irish and Spanish origin so frequent my table. The recipes for me are a way to reflect upon those family members we have lost and the times I eat the same dish with them. Other dishes simply are my education regarding a geographic region in which a long dead relative originated from. For example my great grandmother and grandfather were from Andalucía Spain. I never met them, they were long sense dead by the time I came around but I commune with them through my research on Andalucian cooking. Some recipes survive through the generations long before my great grandparents, and perhaps their lineage as well. Food binds us together and takes us back through time if you allow it too.
Poutine for those not in the know, and if you have never heard of it that is completely normal, it is a specialty of Quebec Canada, specifically from Montreal. A simple dish of pomme frits with gravy and cheese curd. The translation of poutine means “dirty mess” which it looks like from afar, but it certainly is not a mess to the palette especially if you are drunk or cold or both. Poutine comes is several variations from the base dish, frys, gravy, curd. To this base a whole assortment of mixed items can be added. Tonight on mine I will add a variety of pork products, some ground pork, some tasso ham, some bacon. But I am just on a hog rally tonight and want to use up my excessive supply of recently cured pork products. Basically anything beyond that simple base that sounds good to you is far game, but use caution on the gravy. Homemade gravy is key to this dish, don’t fuck around with canned or powered abortions please…do it right or don’t do it at all.
The best part of Poutine is that it fills you up and warms you up. And I am both hungry and cold today. California has been gray and wet for days there was some sun today but it did not warm the soul so I am hoping Poutine will do the trick for me….will post a pic later. Until next time..Chao..
Thursday, January 28, 2010
Tuesday, January 26, 2010
Rain and Chickens
January 26th, 2010
It has been raining off and on daily now for about 10 days here in Northern California. We definitely needed the rain and its good that a nice snowpack is building in the Sierras. The rough part has been the confinement indoors which definitely dampers my mood. With this confinement also has come the common cold, both of my children now have the sniffles. The one bright spot has been watching our vegetable seedlings grow. The plant stand has become a great area of fascination for the kids, I find them constantly peering into the seed start trays and provided commentary on the day to day changes of their progress. This alone is a great reason for you to start your veggies from seed if you have children.
The focus this year is a bit different from the past couple spring season here on the old farm. We purposely passed on the hatching and rearing of more fowl. Currently we have 15 chickens (all hens) which supply us with an excessive amount of eggs over the course of the year. On average most young hens will produce .5 eggs a day over the course of a year. During the spring and summer their laying activities will increase. So some quick math 7.5 x 365 = 2737.5 eggs a year, or 200 a month. Adult birds also require a lot of augmentation to their diets throughout the year. You have to grain them in the winter and the notion that a free range bird requires no additional nutritional requirements beyond grass is totally ludicrous. My feed bill throughout the year for the hens runs about $30 a month in the fall/winter and about $15 in the spring and summer months. So chickens are by no means economical. But they are great additions to ones home or farm. They are hysterical to watch, great for children to raise and understand the mechanics of life from.
There are also many pit falls to raising chicks or keeping your adult flock healthy. The concept of a small run for a flock is totally flawed. Confined spaces breed disease so its imperative to keep the roost clean and provide a large pasture setting for your flock. They do need free range space to be healthy, that stands for whether you have a couple hens or a flock. This space needs to be fenced and safe. Everyone loves chicken in nature, from your neighbors dogs (our neighbor’s dogs have killed 5 of our hens over the years) to foxes, skunks, raccoons, yots etc. You also need to make sure you keep your birds away from any poisons and fertilizers you may have laying around. They will eat just about anything, and possibly die from it. I lost 4 hens that flew over my fence into the veggie garden. I had a troublesome gopher and decided to bait it. They dug down into the gopher mound and consumed the bait I had just laid for him. Did I mention they are smart? They saw the poison pellets and thought “food”, well needless to say it was the last meal they ever ate.
Oh and any notions you got from watching Martha Stuart about letting your chickens run wild in your veggie garden…Chickens will decimate your veggie garden in a blink of an eye. They love to eat greens and any fruits you may have growing in your veggie beds. So make sure to keep your birds well fenced and away from your vegetable garden. If you don’t you will learn quickly that you should have.
But having young chicks around the place this season has been a bit of a sore spot for the kids. We did have a tremendous amount of fun the last couple years in the spring raising chicks. We learned a lot too. They learned about life and death quickly. The first year we were a bit green to the needs of baby chicks. Young birds are susceptible to a whole host of diseases. Many of which pass from hen to egg to chick, others can be spread via water or food. The first year I purchased 25 pullets from a hatchery. My first mistake was ordering the first part of the year. Hatcheries send day old pullets via airmail to your local US Postal Depot. Unfortunately that year it was unseasonably cold. The normal shipping process is to pack several chicks into a 4 section cardboard box. The thinking is that each of the 4 sections would hold up to 8 chicks each. The day old chicks would huddle together for warmth and have enough energy stored up internally to make the trip of up to 3 days in that little box. Well let me be the first to tell you the mortality factor this shipping process is high. Expect a death rate upon arrival of at least 5% to 10%. In my case we didn’t receive a call from the postal depot until late in the day. I made the mistake of telling the kids I was running out to fetch chicks. To my horror when I opened the box at the depot, 8 of the little guys were DOA. Either crushed by other chicks or could not get into the center of the pile to stay warm enough during the trip.
I nursed the remaining chicks back to health over the next couple weeks. Doesn’t matter how much of a tough guy you are either, you bond to the little shits quickly. So it was rough a few weeks into the game when I read on a couple back yard poultry sites that you should give chicks some greens from time to time including grass. Well let me tell right now, don’t feed them anything but sterile water and crumbles until they are at least 18 weeks old. I gave my first year chicks some grass off our lawn as suggested by a couple sites. Then spent the next couple weeks watching them die off one at a time for a horrible little poultry disease similar to Encephalitis. It pretty much nuked the part of their brains that allowed them motor control. A couple recovered a bit but have not been thrifty, eg poor egg layers. So out of 25, 8 were DOA, then I lost another 6 to that disease. The remaining 11 birds were fine until the neighbors dogs eat a couple. So we ended up getting a handful of chicks last year. Then we had a neighbor toss a hen over the fence that wasn’t ours to begin with so now we are at 15 birds.
Moral of the story, just go down and buy chicks from your local Tractor Supply or other feed and grain store. You will want pullet and not straight run if at all possible. Roosters will eventually get to aggressive to handle. The one I kept from my initial run, even through hand reared eventually attacked my 4 year old daughter. She went up to hand feed her favorite hen and he saw my daughter as a treat to the flock and attacked her. Scratcher her pretty good in the face and back, needless to say he was dead by sundown and in a pot of coq au vin shortly thereafter. You don’t need a rooster unless you plan on breeding birds. So save your kids the trauma of getting attacked and dispatch any young roosters you may get in your chicks. Trust me it’s the right thing to do. Be sure to eat him as well. They really are yummy if cooked low and slow.
Wednesday, January 13, 2010
January 14th 2010
Only in America…A beef Tenderloin, some Chili and Chinese
Well I have been remiss on posting consistently over the holidays and now that they are over I will work on being a little more consistent in these posts. If there is any kind of following to these crazy posts I would like to hear from you and what you like or dislike. Obviously I do this for your benefit more than anything else. I know how to do a lot of things and most of them pretty well. If I have an affliction its definitely the Jeffersonian complex. I read all the time and cant sit still ever. If you can create it I have at least tried it once. From welding steel into sculpture, painting, writing, construction, cooking, building computers, servers, networks etc. My belief is when you stop moving you die, doesn’t matter how much you exercise, believe in god, love your family, work, hate, love, etc. You have to keep moving and keep that muscle in your head active. Limit your exposure to all technology that is being thrown at you and get out there, outside, off the beaten path in the weather, in the sun. It is how we are meant to live.
Enough preaching on my part but I do encourage you all to get out and live life as it motivates you.
So on to food. Saturday I pulled out a beef tenderloin and gave it a nice rub of toasted coriander and black pepper corns. Both were milled down in a coffee grinder after I toasted them on the stove top to bring out the aromas. Roughly 3 tablespoons of each. Ground until they are a nice powder. Once it was to the consistency I was looking for I tied my roast and rubbed her down. Then put the whole thing in a non-reactive container with a little garlic and some aromatics, thyme, rosemary, unfiltered olive oil I pressed myself and red pepper flakes. This whole deal went into the fridge overnight. One hour before I wanted to roast it I pulled it out to rest at room temp. Just before tossing it in the oven I rubbed a couple tablespoons of Kosher salt all over it. Adding the salt at the last moment ensures you will not draw all the moisture out of the meat. Always practice this when marinating and you will find the meat you cook is moister and better tasting.
I tossed the loin in a 500 degree F oven for 20 minutes then reduced the temp to 350 degrees F until the internal temp reached 130 degrees F. This is medium rate, 120 degrees is bleeding. 140 is too overcooked for me to comment on.
For this loin I made a tomatoe confit. Simple recipe, add several tablespoons of a high quality olive oil to a pan over medium heat. Add a full head of peeled garlic cloves. Saute over medium heat for 10-15 minutes but do not under any circumstances burn the garlic. If you do toss it all out and start over. Once the garlic is nice and golden add aromatics, your choice, but be sure they are fresh. Just picked from your garden if possible but if the best you can come by is the store then you should be alright. Saute for a minute or two then add about 1 quart of peel drained tomatoes, and a cup of sweet white wine, Madera, marsala etc. Whatever floats you boat in the sweet wine arena. Cook the whole mess down for about an hour. Until the garlic is soft, then break up the garlic and tomatoes a bit with a wooden spoon. Turn the heat off season to taste with salt and pepper. Then toss one more cup of the wine you chose to it. Allow to cool and serve as a side to your loin.
I am big on Yorkshire pudding. Its always good with roast meat and gives you something to do with the pan drippings. Kids love it and so do I. Recipe is super easy. In a medium bowl add a half cup of milk and a half cup of beer, to one cup flour and two eggs. Beat the whole mess well with a pinch of salt. Add one shot of single malt whiskey. Let the batter rest for one hour. Find yourself a cupcake pan and to it add a bit of pan drippings to each depression in the pan. Pure your batter mixture on top of this until it fills the void about half way. Put the pan in a 400 degree oven and immediately turn the oven down to 350 degrees F. Keep an eye on them they should be golden brown in about 2o minutes. Serve immediately.
As a side server a nice green and make a good salad with some type of fungal cheese, blue, stilton etc. For a winter meal its just heaven.
You will have left over meat and then the question is what to do with it. Beef loin is really versatile. You can whip up all kinds of thing with the leftovers. With mine I decided a round of chili was in order. I just felt a deep craving for it. So the hell with it I make chili with a the leftovers of a $30 piece of meat. Chili is supper easy to make and I put beans in mine because I am not a Texan and never want to be one.
Tonight I felt like Chinese food and made, dim sum for dinner. I don’t really care they is totally unacceptable in Chinese society it seemed the right thing to do this even. I also whipped up some other items. But I am way to sleepy to write about them now….More later.
Sunday, January 10, 2010
Another Cold Weekend , Dreams of Summer Veggies
January 10, 2010
A bit on food,
Its yet another unseasonably cold weekend here in California. A big storm is on its way and should drop another inch of water and mostly likely several feet of snow to the Sierras. That should blow out the bone chilling layer of Tule fog that has gripped the central valley now for the better part of the week. The fog has helped the waterfowl hunting and with that assistance I was able to bag a few geese last week. These birds were slowing rendered down with a piece of smoked pork belly and after salting will become a most succulent rielette. Rielettes is an old world charcuterie preparation most likely stemming from some thrifty French butcher. Basically you can take the trimmings of your pork bellies if you are processing bacon and render them down with a bit of veal stock, a leek, and some aromatics (thyme, rosemary, sage, pepper corns, whole garlic cloves, etc.). The whole thing is slowing cook either on top of the stove on the lowest gas mark or in the oven in at the lowest oven setting. What you are after is a very slow gentile boil. In 4 to 6 hours the meat will basically be falling apart in a soup of rendered pork fat and broth. I should note that it is good to flash boil the meat you intend to use by pouring cold water over the meat and bringing the whole batch up to a quick boil. Then you pour off this dirty water which will have become clouded up with impurities and blood. This will help the end produce be cleaner and fresher tasting. It will also suck out some of that pond bottom flavor from waterfowl that seems to turn off so many people. Once you draw off the impurities you can add the leek, aromatics, and broth just so it covers the meat by a few inches.
After the long slow cooking process let the whole mixture cool, then put in a no reactive container and place in the frig for an overnight rest in the flavorful broth. This also allows the fats to rise to the top of the container. The next day you scrape off the fat layer and render it down and strain it though cheese cloth. You will use the fat to seal off you ramekins. The meat you will pull out and either shred with a fork or if you have a kitchenaid mixture place the meat in there with the paddle attachment and blend it for a couple minutes adding some salt as it works. Rielettes is served cold or at room temperature so its ok to over season a bit. You can also add some additional spices at this point. For the straight pork version I use mace, coriander, white pepper and a little all spice. For waterfowl (duck, goose) I use nutmeg, coriander, black pepper and add the addition of dried fruit such as apricots, cranberries, or currents. You can also spike the whole concoction with you favorite booze at this point for some added complexity. Be sure to add a little of the gelatin and some of the purified fat as you mix. You are after a smooth paste not to dry or wet. Be sure to taste the mixture as you work when you are stratified in the texture and flavor load it up in ramekins and pour the clarified pork fat over the top. Allow these to cool in your fridge. They will be most excellent if left alone for a few days in the fridge. These will keep under the fat for several weeks. Normally they don’t make it that long in my house as I eat them up as does my family. They are best served cold or a room temperature with a nice warm piece of toasted bread and a bit of homemade mustard.
Garden Prep
I also spent today prepping for my spring garden. The seeds I ordered arrived earlier in the week and I spent significant time pouring over my exceptionally large collection of heirloom seeds. They needed some organization and this took some time to catalog them all by type, season, etc. I also build a shelving unit I picked up at the hardware store, its five shelves were serve as my nursery for my seed starts. The shelves are made of wood and under each shelf I placed eye hooks and suspended a set of fluorescent lights. I used a bit of chain to hold each fixture. This way I can raise and lower them as required by the plants as they grow. I also purchased a security light timer which I can preset to ensure the light requirements of young seedlings (at least 12 hours a day with a period of darkness). Starting your own plants from seed takes some preplanning but is exceptionally economical. Not to mention you can grow heirloom varietals that your local warehouse superstore or most nurseries just don’t have. You also can grow ethic heirloom species you just cant find other than at your local ethic food restaurants. Crazy stuff too like Culantro which is similar to cilantro but much more flavorful.
My favorite seed suppliers are as follows; (these have consistently supplied me with seeds that germinate every time)
Johnny Seeds http://www.johnnyseeds.com/
Gourmet Seeds International www.gourmetseed.com
Between the two you will find every kind of seed you are looking for. The other fun one to check out that I have yet to order from is the Seed Man http://www.seedman.com/
He has crazy stuff like tobacco, bananas, papayas etc. I have yet to order from him but may pick up some stuff later on this summer. Most of his crazy stuff is tropical so I would not buy it now unless you have a heated greenhouse.
Sunday, January 3, 2010
Cold Days of Winter...
January 3, 2010
Well the pneumonia pretty much has me confined to bed today, which I cant tell you how much I hate being confined to bed. That said about all the adventure I could undertake today was to place my seed order for my spring and summer garden. Here is what I got to augment my already large collection of seed in my seed catalog.
Bean, Asparagus - Red Noodle
Bean Asparagus - Mosaic
Asparagus Bean un Metro (Bacello)
Amaranth All Red Leaf
Tomato Black Pear
Pole Bean Stortino Di Trento
Pole Bean Supermarconi (Romano)
Cilantro Slo-Bolting
Lovage ORGANIC
Chives
Garlic Chives, Ping Giant
Lemon Grass
Tarragon
Beet, Bull's Blood ORGANIC
Beet Chioggia ORGANIC
Cucumber Paris Pickling
Cucumber Hokus
Onion Piatta d'Italia
Cipollini Onion Bianco Di Maggio
Cipollini Onion Borrettana
Deluxe Spring Radish Mix
Basil, Violetto ( Dark Opal ) ORGANIC
Basil Napoletano Bolloso
Basil, Lettuce Leaf Toscano
Basil Thai
Basil Lemon
Golden Mushroom
Poplar Mushroom
The particular item I need more urgently than the rest were peas. Last year I got them in the ground too late and we had a mini heat wave in April which all but stunted the plants to the point where the harvest was about a ¼ of what it should have been. So I am eager to get some peas in the raised beds as early as possible this year. I will also experiment a little and create mini coldframes out of half of my raised beds this year. Each of my raised beds is 5 feet wide and 35 feet long and 12 inches high. When I constructed these beds I placed a double layer of chicken wire down first, followed by several inches of heavy mulch, fresh hay, then a nice bedding soil. This Fall I have been depositing all the leaf material I mow up with my tractor on top of each of the fallow beds. In addition I have a nice pile of compost on the west end of the veggie beds. My plan is to eventually partition off this area into another raised bed specifically designated for potatoes. Oh and a word to the wise, never buy potato starts from seed vendors, nurseries or home improvement shops. Just buy some potatoes at your local grocery store, place in a paper sack and put in a dark place. In a few weeks the spuds you have chosen will have started to grow on their own. Cut up the spuds leaving a few eyes on each piece, let the cut pieces set overnight to dry a bit then plant in well composed soil. As they grow up through the compost continue to add layers of soil. The potato plants will create tons of spuds in each layer of compost. More on that in a later post.
Saturday, January 2, 2010
Fun Jelly and a bit of bacon
January 2, 2010
Well I have never been able to sit still long and walking pneumonia or not I decided to whip up something usual today. There are very few fruits online this time of year less a few type of citrus and what I find somewhat boring, persimmons. There is however an often overlooks edible found all over the western United States that most would pass by and mistakenly believe are a poisonous fruit, pyracanthus. The fruit is anything but toxic, instead it is more akin to apples. You can eat them raw but most would find them mealy. As a jelly with the addition of some citric acid (lemon juice), pectin and sugar it’s a lovely conserve.
The recipe for this is quite simple, locate ripe pyrachanthus berries and harvest them. You will know when they are ripe when the birds start nailing them in huge flocks, usually that is early to mid January where I live in the central valley of California. You will want to gather a few pounds of berries (if not more), which you will wash and remove any stems and leaves. To this add roughly ¾ cups of water to each pound of berries and boil hard for one to two minutes. Strain the berries through clean cheese cloth or a jelly sack. To this add (citric acid, fruit fresh) 1 teaspoon lemon juice and 1 cup sugar to each cup of strained juice. Also add pectin as instructed by the directions on the band you use. Usually its one pack of pectin to 5 cups of juice. Bring this mixture to a boil for a few minutes than add liquid to clean sterile mason jars. Follow standard canning time tables, roughly 5 minutes in boiling water for jelly. Carefully remove jars from your boiler and allow them to cool. Should keep for over a year but I doubt they will last that long once you taste its subtle flavor.
Yesterday I also when ahead and bagged up the 40lbs of bacon, pancetta, tasso, scraps I had laying around for 6 hog bellies I processed for xmas presents. Curing your own bacon is probably one of the easier charcuterie exercises you can execute in the kitchen. This bacon is far superior to anything you can find domestically in any grocery chain and few shops produce to what I would consider this level of charcuterie in the states. Mario Batali’s fathers shop up in Seattle. So here goes the shameless plug for his shop http://www.salumicuredmeats.com/
Should you not muster the courage to cure your own meat then be sure to patron their shop. But I encourage you all to attempt to cure some of your own meats. It really is a lost art that is being revived by a handful of faithful followers like me. You will find that it is critical to locate a reliable farmer or grow your own, preferably from heritage breeds. Stay away from any of the commercially grown animals at all costs, they are raised in horrible conditions, and butchered in filthy commercial factories. If you don’t live near a reliable butcher get together with some friends and go to your local county fair, buy yourselves a nice butcher pig…Plan a weekend, butcher and process the animal yourself. Be sure to follow local laws. Many areas forbid the dispatching of the animals in any area other than FDA approved facilities. But if you can take that next step and dispatch the animal humanely with a clean shot to the back of the head then I suggest it. My reasoning is twofold. First you should realize your food comes at a cost, second there is some ritual to the taking of an animal and you should experience it. Those that have done it tend to be more passionate about how animals are bred, reared and put down. Too much of our society believes meat comes prepacked in cellophane at the local grocery. Believe me when I say you don’t want to see where your meat was raised or processed in those commercial facilities. I realized a long time ago I was a definite carnivore, so I have learned to hunt, butcher and eat…
On to bacon. Nothing could be a simpler process or get you sicker if you don’t follow the rules. Curing by definition is chemically cooking meat to prevent the growth of nasties such as botchalism. Improperly handled and processed meats can and will make you sick if not dead. So make sure you read and understand all the steps in advance and be sure to cure your meats in the fridge and always use pink salt of insta-cure #2 if you plan on a ferment cure. Nitrates and Nitrites have been proven to be cancer causing but vs the painful slow death of botchalism be sure to use them. Pink salt aka saltpeter (this is the stuff your granddad told you was in his K rations that kept the troops from getting aroused) will keep the meat, when properly used, a nice pink hue and prevent the growth of all the nasty bacteria’s and allow you to safely consume the meat you cure.
Enough said on saltpeter and meat.
Get yourself a nice hog belly. You will notice a couple things about the bellies right away, one end is thicker and fattier than the other. From a good sized hog belly you should be able to carve it up into 4 equal pieces. True up the ends and make the nice and neat. With the thicker ends I normally cure then hotsmoke these, with the thinner ones I cure into pancetta. On the hotsmoke side its not uncommon for me to sweet cure these. The overall process is really simple you will make up a batch of cure. This is a combination of salt (only use Kosher Salt), pink salt, sugar, and aromatics.
Basic Dry Cure
2 Kilos Kosher Salt
10 grams pink salt
200 grams sugar (double this for sweet bacon)
Aromatics (pepper corns, red pepper flakes, rosemary, bay, nutmeg, allspice, mace, coriander, etc.)
Find yourself a container/s that will fit in your frig and hold your clean up, butchered pork belly. Mix your dry cure well, make sure the pink salt is very well incorporated. No working on one piece of belly at time rum in liberally the dry cure you just made. Once you finish the first piece place it in your container, stack the other pieces on atop the other. After the first 24 you will notice a good deal of liquid has drained from your belly pieces. Discard this and repeat the salt rub on each piece and restack in your container, make sure you switch up the order each day. Place the bottom piece on top. Repeat this process every day for 5 days and its done. Should any part of the pieces feel mushy let it cure a few more days. You are looking for a firm texture. Once you are sure its cured pull them out and carefully wash your bacon of all excess salt. Dry with paper towel and find a nice clean cold place and hang them for a couple days. I use my wine cellar. For the pieces I wish to smoke I pull those out slap them in the smoker and cold smoke for 3 hours then hot smoke until the internal temp on the thickest part of the bacon reads 150 degrees F. The other pieces I hang for 10 days or so then package those I will not eat right away with a vacuum sealer and drop them in my freezer. I keep one of the slabs in my fridge rapped in cheese cloth and use as required in all my cooking. Rapped this way the bacon will keep for several weeks. Enjoy..
Friday, January 1, 2010
Happy New Year
January 1st, 2010
Happy New Year to those that read this.
Of course being the first day of the New Year my mind is on the next several months and what needs to be done around the old compound. The veggie beds are 50% occupied with my winter crops, carrots, chard, parsnips, turnips, radish, cardoons, potatoes, horseradish, leeks, onions, fava beans, garlic..you name a winter crop and its out there. The greenhouse is almost online with the lettuce I started several weeks ago. Also in the greenhouse the celery and parsley are a few inches in height and should be harvestable in another 30 days or so. About 40% of the greenhouse is fallow and I will use that space in the weeks ahead for my veggie starts; tomatoes, egg plant, peppers, cucumbers, summer squash, etc. etc .
First spring crop to go in will be peas, I should just get out there today and sow them. I am sure many of you in areas outside of California just cringed insomuch as you are either still frozen or have frosts ahead. Normally I can plant tomatoes in the first week of March. There is some level of risk in doing so as the ground must be at least the mid 60’s. If the roots of tomatoes get to cold you will have rot issues on your fruit later in the season. This can only be addressed with the addition of lime to your beds which causes some additional issues further down the road. So that being said I usually see how the weather looks in advance of dropping my tomatoes in the ground in the first weeks of March. But before any of that can commence I need to condition the raised veggie beds. Half have sat fallow over the winter, and I have amended the soil with green manure (grass clippings, leaves, etc) and hot chicken manure. Also I will keep my eyes out for some local horse manure, fold that in at the end. The other big consideration is to rotate crops into different beds each year to avoid diseases the prior crop could pass on to your spring and summer garden. Finally I need to inventory my seed vault and fill in anything low and add anything new I am interested in planting in the coming season.
On the food front there is only one dish you should have on the stove today. Hoppin’ John. This dish’s origins are humble; The dish is believed to have originated in Haiti among those unfortunate souls who had been stolen from Africa to work the plantations of the Americas. They used what they had on hand, often the lesser cuts of meat, and those items that could be scrounged up in the surroundings. What the dish looked like 400 years ago and what it looks like today probably have changed little. The two primary ingredients are beans and salt pork. In addition to this you can add the trinity (onion, celery, and peppers). Okra, leeks, etc could be added as well. The reason you make Hoppin’ John is that in the South it is believed to bring you good luck in the new year. That is enough for me to have it on my table; recipe;
1 tbls olive oil
1 leek slivered
1 heart of a celery plant (use the inner stalks and be sure to include the leafy bits at the top)
2 carrots diced
2 ham hocks or tasso ham
1 bay leaf
1lbs black eyed peas, soaked overnight and drained ( you can also use northern white, or other beans on hand)
Enough chicken stock to cover hocks and beans
Couple cloves of garlic
Aromatics, thyme, rosemary, oregano etc.
In a large stock pot add the olive oil bring up heat to medium, add garlic, leeks, carrot, celery. Sauté for about 5 minutes until the leeks become translucent. Toss in your aromatics, ham hocks or tasso ham, add bay leaf. Pour chicken stock in and put burner on low. You will slowly cook this until the meat falls off the hocks, or until the tasso falls apart and the beans are soft. Remove all the hocks pick the enable bit out of them and discard the bones and gristle. Return the meat to beans and you are good to go. You can sever it with a little crystal hot pepper sauce or on its own…enjoy.
Subscribe to:
Posts (Atom)